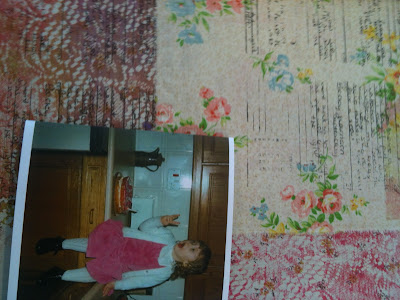
A3 sketchbook

Bibliography

www.memoryroth.blogspot.co.uk


9783775709538

Franz Marc: Horses


ISBN 10: 3775709533 / 3-7757-0953-3
ISBN 13: 9783775709538
Publisher: Hatje Cantz Pub
Publication Date: 2000
Binding: Hardcover


August Macke

ISBN-13: 9783775722605

ISBN-10: 3775722602

Author: Unknown.

Binding: Perfect Paperback

Publisher: Hatje Cantz Verlag

Published: January 2008


Kath kidson

Sew!

ISBN-13: 9781844007561

ISBN-10: 1844007561

Binding: Paperback

Publisher: Quadrille Publishing Ltd

Published: December

Proposal


Exploring a range of different methods, including negative spaces, insulation and assemblage; then investigated grids, layers and reflections, I found that gradually working through projects I began improving on skills and learning new ones to bring new techniques in to my work, this allowed me to identify my strengths and weaknesses within my artwork.

           I work well at intricate hands-on and practical work in a range of media, particularly different materials.  I also have a wide range of skills, not just specialising in one area, I am very interested and work hard.

           My weaknesses within art are that when I first started the course I was unable to draw or paint well but I have worked on still and life drawings and the use of acrylic paints and I have practised and improved my standard. I now have the knowledge and skills to apply and take forward to a higher level.

           I was unsure about which pathway to choose as I am very passionate about both  textiles and photography.  I therefore decided to keep my options open and have combined both of these areas together in this final work.

I don’t have a clear picture of my future career but I know that I am interested in and enjoy working with both textiles and photography so am hoping to pursue a career within these areas.

            To explore the use of materials and photography to express memory.    

I intend to use myself as a starting point and a subject in my project by exploring and documenting my memories, such as my tenth birthday and the excitement of being double figures, by using materials and photographs to express the mood from a memory.


I decided, from the grids, layers and reflections project I started, that I would use myself as I subject and concentrate on the theme of Me, Myself and I.  As I worked more with this theme, I found it was far too extensive an area, so I narrowed it down to two ideas within the theme, namely memories and reflections.  I had a discussion with my pathway tutor about my methods and decisions and came to the conclusion of focussing on memories.

I intend to explore my theme futher using photographs of memories I remember from when I was younger. Then, by using textile techniques, turn my memories and photographs into a visual story.

I had a look in the library for artists’ work which I liked and then found out more work by the specific artists on the computer.  To develop the work I may take ideas from their work and adapt the idea to the theme in my own work.

I will collect photographs from past events and explore what media I find most suitable to present them in.


In the future I would want my work to attract people’s attention and make an impression so that they want to find out more about my work.


I have many influences around me from the internet, magazines, old photographs and artwork; I have recently visited the Liverpool Tate Gallery; and am highly inspired  by the natural world around me.


I am inspired by many artist’s work such as Henry Moore's textile pieces from the 1960’s such as the quirky old fashioned wallpapers; and Henry Matisse’s moderist wildlife and nature paintings.

Textiles artists who have inspired and given me ideas are:   Shirley Craven (Hull Traders), Celia Birtwell, Zandra Rhodes, David Hockney’s expressive joiners, Franz Marc and Henry Moore.

The photography artists I have looked at are: Eadweard Muybridge, William Morris, Humprey Jennnings’ Horses Head 1937-1940 and James Carnegie.

I have gained ideas and may adapt and develop them in my own work. For example, the flip books of a series of action images, flicked to create the illusion of continuous motion, inspired by Eadweard Muybridge.

            I will be using the media of fabrics, photographs, inks and paints.   Also I would like to explore new medias and ideas to see what the outcome would look like.


            I will be using the methods of information gathering, recording of ideas and reasons for doing a piece of work, in my sketchbook, journal and blog.

  To evaluate my project in progress I will be continously checking back to my brief to ensure criteria is being met.  I will ask my pathways tutor for feedback, and improve and cover all aspects several times till they cover all the requirements a brief asks for.

My criteria of success is to have produced a unique and thought provoking piece of work that I am proud of and a number of people like.  To determine this I will ask a wide ranged audience, covering age, gender, profession, experience and opinion, for feedback on completion.                

If anything goes wrong in the process I will record and take note of it, reflect on it to see how to improve it.  If the problem is irrepairable, I will learn where and why it went wrong, learn from the mistake, then annotate and record it in my journal and try again.      

            I will be thinking all the time about what I am doing and working to the best of my ability.

Evaluation

The theme for my Final Project was ‘Me, Myself and I’, I have covered all briefs and achieved all goals.

I found the project to be very time consuming, due to which I didn’t achieve some mediums on my rosettes which I would have liked.

However, the final outcome is very visually appealing, the colours blend well together and the materials show good contrast.

Despite some frustrating setbacks, it was a very enjoyable process to take part in, the materials were easy to print and paint on and I was able to develop some new skills.

I am disappointed that my piece didn’t attract as many viewers as I had wanted, perhaps for not knowing the meaning behind it but, for me, the piece is very successful and I am pleased and proud of what I have achieved.

Friday 22nd June 2012

Hand in all work and get accessed the end of the year, and a very fun one.

Monday 18 June 2012

On monday I finished stapling my work to the boards as parts had come away which I hadn't stapled. Then when I had completed my work I began helping with other peoples who needed it so everyones wotk was ready for the show on wednesday night.

Thursday 14th June 2012

I placed my rosset on the board to see what it looked like in proportion with it.


I decided how I am going to display my work, ready to staple to the board. I stapled it to extra material behind my frills on my rosette so they were s
disguised. Which turned out really well as it hangs really well.

Wednesday 13 june 2012

By Wednesday night, with a very good group effort had cleaned the room painted all boards so they looked presentable to the public. They had all been moved in to positions to take everybody in to account, and doing this everyone was ready to come in on Thursday morning to start hanging all our work up in designated spaces.

Monday 11th June 2012

We came back to college after the half term holidays to find all tables had been moved out of the room and any other objects. So that made it tidy to bring in big cleaning machines as students cant mop the floor due to the plug sockets fixed in the floor.
 

Thursday 7th June 2012

I have completed the frill around the outside of the rossett, but my own sawing machine doesn't have the free foot focialities. So I have decided to do work on the other things which need doing and quickly do free foot on the college machines. As doing it by hand would take a considerably long time.

Tuesday 5th June 2012

I would like to gain today;
-Get my sketchbooks to date
-Annotate and improve the 10 points which are noted
-Be up to date with my journal
-If I have timeleft I need to start sawing my rossetts.

What I'd like to record in my sketchbooks;
-Artist research
-My ideas Ive had already
    -My Ideas;
          -Customise a hoodie influenced by Paddy Hartley
          -Also a personal backdrop to make the board more interesting
          -Personalised Dress
          -Set of 3 canvas's of my memories
          -My love for animals to develop in to something


-How ive go the idea of the rossetts
-Designs of my rossett
-Artists who use words and textiles in their work, to represent a memory
-Some ideas Ive got extra for my exhibition if theres time.

Monday 4th June 2012

   Ive annotated samples which I wasnt so keen on and the ones I liked but haven't used in my work. Some samples I have used to make my Final Major Project look better.

Friday 1st June 2012

   I have finished all my screen prints on my other rosset. As I had all the equipment out I thought of making some extra screen prints just incase I need them, as I wasn't going out the way to do it. The extra prints were just incase I want to use it in my work in the holidays as I dont have access to college or printing mediums. But some ideas I have had to develop and improve my work or finish off are;
finish 3 sketchbooks
blog
stitcn and finish my rossets and maybe develop future in to an umbrella
feedback sheets
evaluation
improve my proposal

Thursday 31st May 2012

   I used a template drawn from a picture to develop in to making a butterfly and applied to my work with fancy free hand stitching, which is a setting on the sawing machine. Then finished any other stitching which needed doing before putting my edging on with pleats as it will be harder to stitch on after ive done this.
   Before leaving college I decusted with Danielle what priorities needed doing and what methods I needed to do with the facilities in college, also what I cant finish off at home. So I came in on the Friday after deciding I needed to do more screen printing as I could so that at home. And as I have access to a sawing machine at home, which ment I was able to finish off my two final pieces at home.

Wednesday 30th May 2012

   I embroidered in to one of my rossets, but at the end of the day I wasnt too sure about it the was just something missing. So I asked other people for their opinion. The feedback was to put more depth in to my work, so I decided to make a a 3d butterfly as I like animals.

Step by step lace printing

First you need to get a selection of your chose of pigment dyes, a piece of lace, material, a bit piece of paper and a roller.


Place the paper on a layer of newspaper so you dont dye the table, then pour a blob of pigment dyes on the piece of paper and spread evenly with the roller.


Place the lace on top and softly press so the dyes covered all your lace. Then remove from the paper.
                                                     

Place the lace on the material dye side down, dont move once placed. Using your roller roll over the top of the lace carefully.


Know with great care lift the lace off the material and hopefully it leaves a lace pattern print on your material.


After that repeat the process above as many times, till satisfied.
 

Friday 25th May 2012

I spread out my background of my rossett on these special tables, were, when you iron your material so them, the material sticks to the tables. So your material is not creased and cant move, this allows any screen printing or any work I needed to do on my material, which I want to come out well.
- I first drew on my piece of material a large circle, so I know were to place any design I would like to do.
- Then with the decision and opinion of a couple of people we decided were to place all the photo's or prints I am using.
- Before that I decided to make more than 1, because of the amount of images or items I would like to use, and the groups they all fit in.
- Before firing ahead I tried out my prints to see how well they were going to turn out, as I hadn't printed them before. All photo's of my layouts are shown below.


-When printed and produced, I needed to leave the photo's to dry. So whilst waiting for it to dry, I layed out the ideas and design of my second design on the next rossett. But when I had chosen were everything was going there was a strip off set which was very plain and needed something to take your eye away from it. So in the strip I wrote friends underneath each other but writing it backwards alternatively.

- I used image maker to transfer an image to material, which looks just like pva glue. I stuck the images to my material, but with this tecnique the image transfers back to front, but I wasnt that bothered about that. I needed to leave it to dry, I have left it over the weekend to thoroughly dry.
- After leaving my work and asking other people for their opinion of my work, so after having feedback and having a think about it. I have decided that my piece so far doesn't show much potential and range of skills which I could incorporate;
   -painting
   -felt
   -weave
   -stitch
   -bonder webb
   -tie dying
   -mod rock
   -bows
   -hearts
   -put the used the lace on
-Also i have been thinking about how else I could make a rosset more interesting, I could develop it future into an umbrella, so its combinding 3d in to it.

Thursday 24th May

After all work produced on the Wednesday allowing it to dry over night. I began monoprinting on the strips putting words, symbols or numbers which I like or represent me. For a step by step demonstration of how to do monoprinting see step by step monoprinting page.

Step by step monoprinting

First you need some acrylic paint, an aluminium plate, material, roller and a clean end of a paintbrush.


Put a good blob of plain on the aluminium plate, ready to role.


Now using your roller start rolling the paint evenly all over the aluminium plate. But not too thin.


Next carefully place the place on your material you want to print or write on, try not touch any of the material which is placed on top of the paint as you will get finger prints and blodges on your piece of material.


You can now begin writing on with your clean opposite end of the brush of a paint brush.


Then slowly remove the material from the paint and place it again on the paint to do it again.

Wednesday 23rd May 2012

I bought the material which I needed, for use round the outside of my rossett to print lace pattern on. I then cut the material in to long strips for frill on my rossett. I found that I hadn't done enough lace printing on the material so after finding this problem, I had to find a solution; so strip by strip I began printing more lace pattern on them. But after I had done all this it was too over powering, so I had come to another stumble so I toned it down by applying white acrylic paint randomly spaced giving a smooth effect to my work. All the pictures are shown below, also samples in my sketchbooks.


Tuesday 22nd May 2012

I have chosen do do two rossetts on a large scale.
-I have had feedback off Danielle about my proposal
-I have had a discussion with danielle about my final piece, we have decided what to do and I did a quick sample to see what it would look like. So on Wednesday morning I needed to buy my material and start making it.
From: greens- material- baby blue
                                     - baby pink  2 Metres
                       1 Metre bonder webb
                       01254 680954